


-
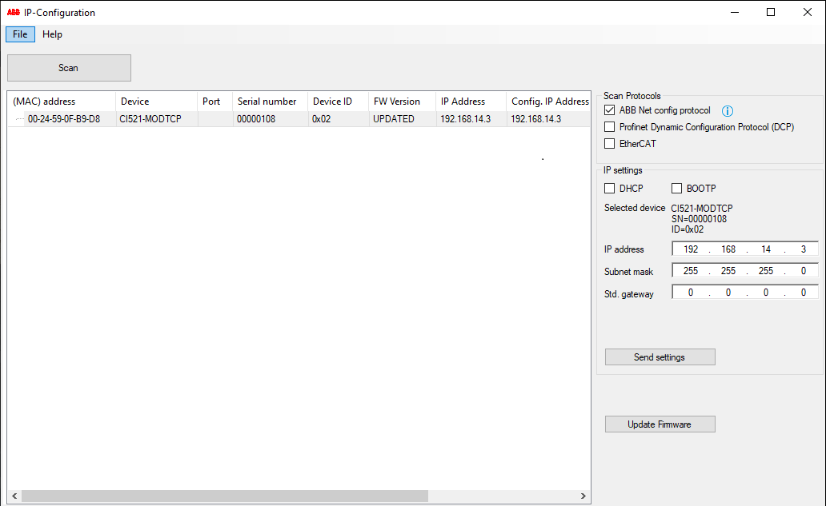
In order to change the IP address of devices perform a network scan.
-
Select a device from the list and select the appropriate protocol under “Scan protocol”.
“DHCP” or “BOOTP” option: If required, DHCP or BOOTP can be used to receive the IP address for the device from the server.
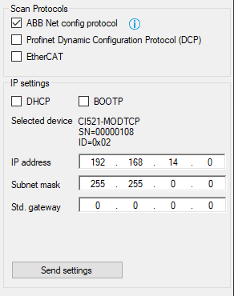
“IP address”, “subnet mask”, “Std. gateway”: Use these fields to change the IP address settings including the settings for the subnet mask and the standard gateway. Ensure that the combination of connection settings is correct.
Note for CI52x-Modbus devices
Note for CI52x-Modbus devices
Consider the behavior of CI52x-Modbus devices if the last number of the IP address is set to "0".
-
Change the settings for the IP configuration and click [Send settings] to transmit the data to the device.
Note for PROFINET devices
Note for PROFINET devices
The device name of PROFINET devices can be edited. If changing the name, ensure the following rules apply:
-
Labels must be separated by "."
-
Total length: 1 to 240
-
Label length: 1 to 63
-
Labels can consist of characters [a-z] and numbers [0-9]
-
Labels are not allowed to start with "-"
-
Labels are not allowed to end with "-"
-
-
In order to keep all IP changes after a power cycle, the settings can be stored permanently. Confirm the prompted message during the scan process.
Check last number of IP address
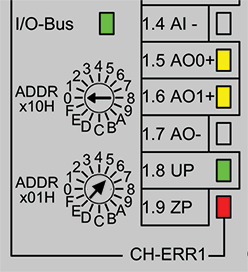
This hint is only valid for CI52x-Modbus devices.
Check the last number of the IP address. If it is set to "0", the IP address setting for this last number will be used from the rotary switches on the hardware device.
Example:
|
Automation Builder |
AC500 communication interface module (rotary switch) |
|---|---|
|
IP address: 192.168.14.0 |
IP address: 6 |
 |
 |
|
As a result, in the field “IP Address” the last number is set to "6":  |
|