


Mounting on DIN rail
-
Mount DIN rail 7.5 mm or 15 mm.
-
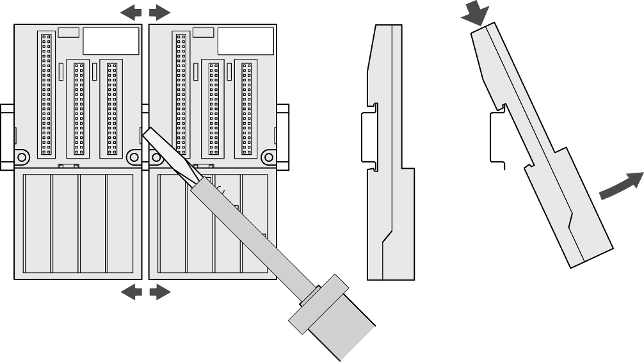
Mount the terminal unit.
The terminal unit is snapped into the DIN rail in the same way as the terminal base. Once secured to the DIN rail, slide the terminal unit to the left until it fully locks into place creating a solid mechanical and connection.
When attaching the devices, make sure the bus connectors are securely locked together to ensure proper connection. Max. 10 terminal units can be attached.
-
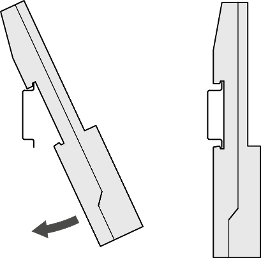
Demounting: A screwdriver is inserted in the indicated place to separate the terminal units.
Mounting with screws
If the terminal unit should be mounted with screws, wall mounting accessories TA526 must be inserted at the rear side first⮫ “TA526 - Wall mounting accessory”. These plastic parts prevent bending of the Terminal Base while screwing on.
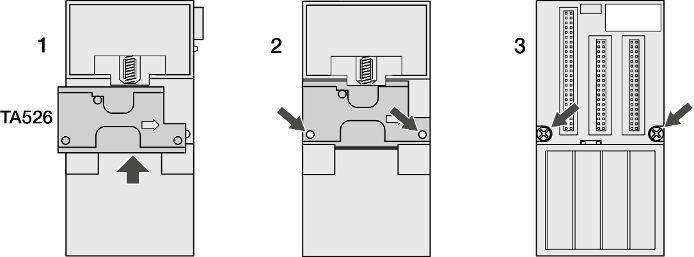
By wall mounting, the terminal unit is grounded through the screws.
-
The screws must have a conductive surface (e.g. steel zinc-plated or brass nickel-plated).
-
The mounting plate must be grounded.
-
The screws must have a good electrical contact to the mounting plate.
Practical tip
The following procedure allows you to use the mounted modules as a template for drilling holes in the panel. Due to module mounting hole tolerance, it is important to follow these procedures:
-
On a clean work surface, mount no more than 3 modules (e.g. one terminal base and two terminal units).
-
Using the mounted modules as a template, carefully mark the center of all module-mounting holes on the panel.
-
Return the mounted modules to the clean work surface, including any previously mounted modules.
-
Drill and tap the mounting holes for the screws (M4 or #8 recommended).
-
Place the modules back on the panel and check for proper hole alignment.
-
Attach the modules to the panel using the mounting screws.
If mounting more modules, mount only the last one of this group and put the others aside. This reduces remounting time during drilling and tapping of the next group.
-
Repeat the steps for all remaining modules.