


Requirements
Note the requirements when working with CODESYS Control Win V3 and CODESYS Control RTE V3.
Creating and scanning a project
-
Install the EtherCAT device descriptions (ESI XML files) of the deployed devices into the device repository.
-
Create a new project with your desired controller. On the “Communication Settings” tab, set the connection to the controller in the device editor.
-
Insert the EtherCAT Master below the controller as a new device.
-
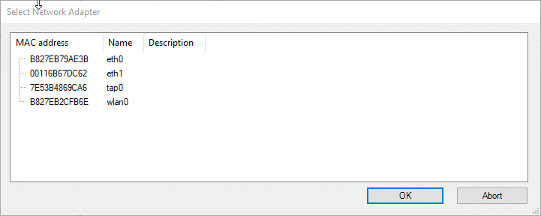
Double-click the EtherCAT Master to open its editor. Click the “Browse” button. In the next dialog, select the network adapter for EtherCAT communication.
-
Download the project to the controller so that the EtherCAT stack is loaded on the controller.
If this step is not performed, then the error message "Device scan is not possible: The stack is not available. Please log in first." is displayed when scanning the devices.
-
Scan for devices in the network. To do this, select the EtherCAT Master and click “Project Scan for Devices”.
The connected devices can be read both when the controller is in stopped state and started state. The scan also works in logged out state.
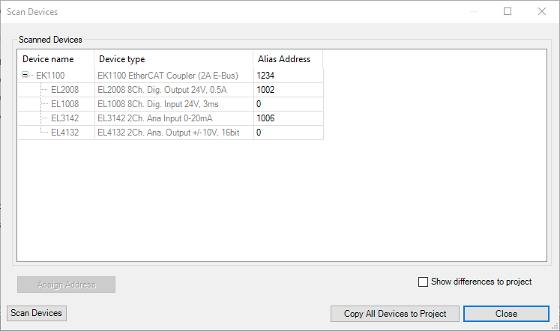
After a short time, a dialog opens to display the connected devices.
If the dialog remains empty, then there is no connection to the devices. In this case, check that 1) the network cable is connected correctly, 2) the devices are powered on, and 3) the correct network adapter is selected.
Errors and messages are displayed in the logger of the PLC or in the EtherCAT Master to help in any subsequent diagnosis.
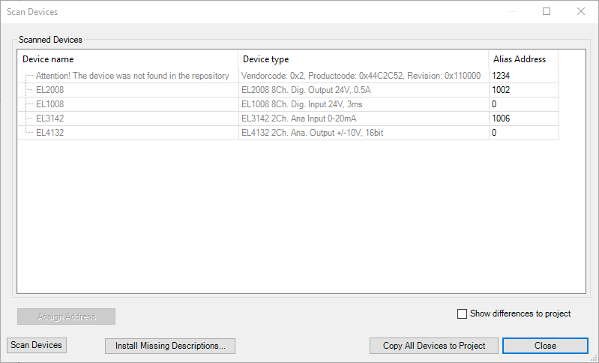
If device descriptions are missing, then this is displayed in the scan dialog (message “Attention! The device was not found in the repository”). You can install the missing device descriptions directly in the scan dialog. To do this, click the “Install Missing Descriptions” button.
You can insert the devices into the project fully only after all device descriptions have been installed. Otherwise CODESYS cannot determine the topology for star branches.
-
Copy all detected devices into the project. To do this, click “Copy All Devices to Project”.
-
Download the changed project to the controller again and start it.
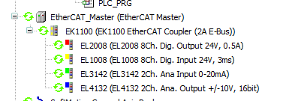
After a few seconds, the devices become functional and are displayed in the device tree with a green arrow.

-
See also: ⮫ Scan for Devices