


You can get displayed text in an element by assigning a string in the element property “Texts Text”. For example all base elements have this property. Also, you can get displayed a text as a tooltip (element property “Texts Tooltip”). Texts assigned in this way are static. They are managed in the object “GlobalTextList” in view “POUs” and they cannot be modified during runtime, neither programmatically nor via an user input.
However, you can extend a static text by (exactly) 1 placeholder containing a formatting specification, in order to output the content of a variable at this place. At runtime the current value of the variable, which you have assigned to the element via property “Textvariable”, will be output.
On the possible formatting specifications please see:
By dynamic configuration you can animate the optical representation of the text.
You can localize the static texts, if you have set up multilingualism in your project.
See some examples for the text configuration of visualization elements in the following chapters.
Labeling an image element with a static text
Precondition: A project containing a visualization is opened. You have an image file representing a stop symbol.
-
Below the Application object insert an object “Image Pool” named
ImagePool_A. -
In the image pool
ImagePool_Aadd your stop symbol image file with IDStop.
-
Open the visualization and from the ToolBox draw an element “Image” into the editor.
The input assistant opens. In tab
Categoryyou see the image poolImagePool_A. -
Select the image
Stopand close the dialog with “OK”. -
Configure the property “Text” of the image:
ImagePool_A, Stop -
Configure the property “Text properties Horizontal alignment”:
Left. -
Configure the property “Text properties Vertical alignment”:
Bottom.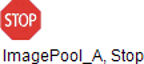
Text output: Element outputs the result of ST code which is executed on a mouse-click
Precondition: A project containing a visualization is opened.
-
Open the visualization and insert a “Button” element.
The “Properties” view opens for the new element.
-
Configure property “Text”:
Number of clicks: %IThe string contains the placeholder
%I. -
In POU
PLC_PRGof the application declare a type-conform variable:iClicks : INT; -
Configure the property “Text variable” of the button element with
PLC_PRG.iClicks.At runtime the variable value will be output instead of the placeholder.
-
Below property “Inputconfiguration”, in the cell containing the input event
OnMouseClick, click on “Configure”. -
From the list of possible actions choose
Execute ST-Code. -
Enter the code for the action in the editor “Execute ST-Code”:
PLC_PRG.iClicks := PLC_PRG.iClicks + 1; -
Close the dialog with “OK”.
The user input is configured.
-
Build, download and start the application.
The application is running. The visualization opens. The element is labeled and the number of clicks will be output. If you as user click on the button, the number will be increased.

Text output: Dynamic output using a textlist
Using the “Text field” element you can produce a dynamic text output. The text output can be effected via an user input or via the application program.
Precondition: A project containing a visualization is opened.
-
Open the visualization and insert a “Text field” element.
The “Properties” view shows the configuration of the element.
-
Below the application add a Text List with the following entries:
Textlist_A.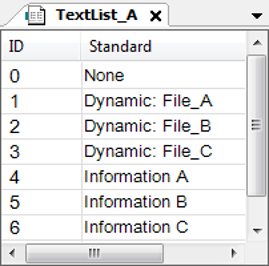
-
In POU
PLC_PRGof the application declare the text variable:strTextID : STRING := '0'; -
Also declare the variable
strTooltipID : STRING := '0'; -
Also declare the variable
iText : INT; -
Configure the property “Dynamic texts Text List” with
'Textlist_A'. -
Configure the property “Dynamic texts Text index” with
PLC_PRG.strTextID. -
Configure the property “Dynamic texts Tooltip index” with
PLC_PRG.strTooltipID. -
In POU
PLC_PRGimplement the CASE instruction as shown below.The variables in property “Dynamic Texts” are programmed.
-
Configure the property “Inputconfiguration OnMouseclick” for
Execute ST-CodewithPLC_PRG.iText := (PLC_PRG.iText + 1) MOD 4;For element “Text field” an user input is configured.
-
Build, download and start the application.
The application is running. The visualization opens. In the text field the text
Noneis output. When you as user click on the element, the text changes toDynamic_ File_A. And the matching tooltip is available:Information A. With each click the text changes according to the CASE instruction.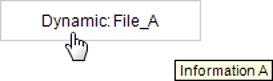
CASE instruction
CASE iText OF
0:	strTextID := '0';
	strToolTipID := '0';

1:	strTextID := '1';
	strToolTipID := '4';

2:	strTextID := '2';
	strToolTipID := '5';

3:	strTextID := '3';
	strToolTipID := '6';
ELSE
	strTextID := '0';
	strToolTipID := '0';
END_CASE;
Text output: Configuring a static + dynamic text output
In property “Texts Text” you can define a text in order to get a static text output. A text in “Texts Tooltip” will be displayed as tooltip. You can configure the text in a way, that the content of a variable is additionally output.
You can extend a static text by (exactly) 1 placeholder including a formatting definition, in order to output the content of a variable at this place at runtime. The variable must be assigned in property “Text variable”. When the variable value changes in the application code, then at the same time the output in the visualization changes.
Precondition: A project containing a visualization is opened.
-
Open the visualization and insert an element “Text field”.
The “Properties” view shows the element configuration.
-
Configure the property “Texte Text”:
File name: %sThe text contains the placeholder
%s. -
In POU
PLC_PRGof the application declare a type-conform variablestrFileName : STRING := 'File_A'; -
Configure the property “Text variable” of the text field with
PLC_PRG.strFileName.At runtime the variable value will be output instead of the placeholder.
-
Build, download and start the application.
The application is running. The visualization opens. The text field element displays the text:
File name: File_A
Configuring text input in a text field
You can use the “Text field” element in order to output the text given by a variable, or to provide a place, where the user can give input on the variable.
Additionally you can configure a text input. In this case on an user input an input field in the element “Text field” will appear. As a precondition you must have configured an user input action in the property “Inputconfiguration”.
Showing text as a tooltip
Precondition: A project containing a visualization is opened.
-
Open the visualization and insert an element “Text field”.
The “Properties” view shows the element configuration.
-
Configure the property “Texts Text”:
File name: %sThe text contains the placeholder
%s -
Configure the property “Texts Tooltip”:
Storage location: %s -
In POU
PLC_PRGof the application declare a type-conform variable strFileName : STRING := 'File_A'; -
In POU
PLC_PRGof the application declare also the variablestrFileDir : STRING := 'D:/Data'; -
Configure the property “Text variable” of the text field with
PLC_PRG.strFileName.At runtime the variable value will be output instead of the placeholder.
-
Configure the property “Tooltip” of the text field with
PLC_PRG.strFileDir. -
Build, download and start the application.
The application is running. The visualization opens. The text field element shows the text
File name: File_A. When the mouse cursor is moved above the text field, the tooltip will be displayed:Storage location : D/Data.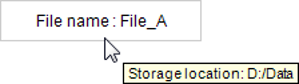
Configuring element “Text field” for text input
The user should be able to enter text in a text field. For this configure an input
of type “Write variable” on a text output variable. This text output variable will store the text input of
the user and will display this text instead of the placeholder (this is %s in the example below). You specify the text output variable in the property “Text variables Text variable”.
Precondition: A project containing a visualization is opened.
-
In POU
PLC_PRGof the application declare a string variable:strInput : STRING; -
Open the visualization and insert an element “Text field”.
The “Properties” view shows the configuration of the element.
-
In property “Texts Text” enter
Input: %s. -
In property “Inputconfiguration” for mouse action “OnMouseClick” click on “Configure” to open the “Input Configuration” dialog box. There choose action “Write a Variable” and activate option “Use text output variable”. Close with “OK”.
-
In the element property “Text variables Text variable” assign the text output variable
PLC_PRG.strInput. -
Build, download and start the application.
The application is running. The visualization opens. The element outputs the text:
Input:. Click in the element to open an input field, where you can enter a string. After having terminated the input by [Enter], the text will be adopted.
Animating the text display
Configure the property “Font variables” in order to animate the display of a text. All base elements have this property, additionally the table, scrollbar and text field element.
Configuring the 'Label' element
Precondition: A project containing a visualization is opened.
-
Open a visualization and insert an element “Label”.
The “Properties” view with the pre-set property configuration opens.
-
Configure the property “Texts Text”:
Visualization A.
Making an element invisible
You can configure the property “State variables Invisible” in order to hide an element in the visualization.
Precondition: In the visualization you have configured a text field, which gets visible only, if a certain application variable gets TRUE. For example in order to show certain instructions or descriptions only in a certain state of the machine.
-
For the text field element configure the property “Texts Text” with
Error detected: Do the following....Configure the property “Text properties Font color” with “dark red”.
-
In
PLC_PRGdeclare the variablebIsInvisible : BOOL : TRUE;(this is the initialization for the current example; normally the variable should be set to TRUE by the application program under certain conditions. -
Configure the property “State variables Invisible” with
PLC_PRG.bIsInvisible. -
Build, download and start the application.
The application is running. The visualization opens and the text field is not visible. When you set
bIsInvisibletoTRUE, the textfield will be displayed.