


The sample project C:\Program Files\CODESYS 3.5.17.0\CODESYS\Projects\Visu\ExamplesVisuDemoOverlay which is provided in the standard installation contains an extensive user interface.
There you will find the Dlg_Desktop_ControlsDetails dialog. The following steps show you how to program this dialog so that you as a
visualization user can then it in the title bar and then move it.
-
Open and extract the sample project and update the device.
-
Open the “Project Environment” dialog, and on the “Visualization Profile” tab, set the profile to “CODESYS Visualization 4.1.0.0”.
Using movable dialogs is possible in version 4.1.0.0 and higher.
-
In the “Devices” view, click the “Visualization Manager” object.
On the “Settings” tab, the “Support client animations and overlay of native elements” option is enabled, which enables the overlay functionality.
-
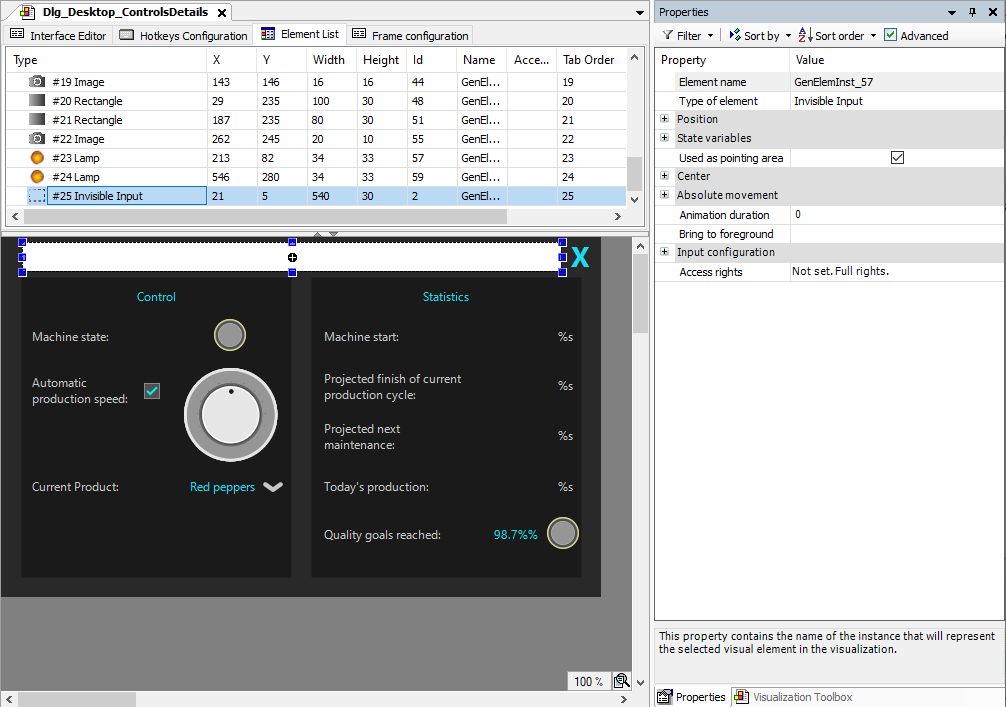
In the visualization editor, open the
Dlg_Desktop_ControlsDetailsdialog. -
In the “Visualization ToolBox” view, find the “Invisible Input” element and drag it to the editor.
-
Drag the borders of the element over the title bar. Do not cover the close menu.
-
Select the new element in the element list and then switch to the “Properties” view.
Hint: Make sure that all properties are displayed in the view. If necessary, enable the “Advanced” option.
-
Enable the “Used as pointer area” property of the selected element.
The dialog now has its own pointer area and can be grabbed there to move it.
-
Compile the application and start the application as WebVisu
(http://localhost:8080/webvisu.htm).The application runs. In the Dashboard below
Control, you can click the exclamation mark to open theControl Detailsdialog. You can now grab the dialog in its pointer area and move it.